
Elastic Beanstalk Multi-Container Docker Deployment
Elastic Beanstalk is one of AWS’s numerous services; is an orchestration service for deploying applications which orchestrates various services including EC2, S3, Simple Notification Service, Cloudwatch, autoscaling and Elastic Load Balancer. This makes it easier for developers to quickly deploy and mange applications you upload to the AWS cloud. Developers only upload their application and then let the AWS Beanstalk provision and handle configuration.
Elastic Beanstalk has deployment support for many languages including Go, Java, Node.js etc and deployment options for docker containers and Multi-containers; which we’ll be taking a look at.
As we’ll see we only to configure a single file for this deployment which is the Dockerrun.aws.json. Before this we need to build and push our container image onto either a public or private container registery; this can be the AWS ECR but I prefer docker-hub
and the docker-image we’ll be deploying is the hub.docker.com/idawud/gql-server -which is a graphql server implementation in Go, which is running on port 8080 on the container.
In the Dockerrun.aws.json file we the json below;
{
  "AWSEBDockerrunVersion": 2,
  "volumes": [ ],
  "containerDefinitions": [
      {
        "name": "gql-server",
        "image": "idawud/gql-server",
        "essential": true,
        "memory": 128,
        "portMappings": [
          {
            "hostPort": 80,
            "containerPort": 8080
          }
        ]
      }
    ]
  }
"AWSEBDockerrunVersion": 2,; specifies the AWS Docker version to use in this we case version 2.
"volumes": [ ],; this is where we can declare all the volumes which can be shared among multiple containers and store data.
"containerDefinitions": []; this where you list out all the images you want to deploy. The sample above only contains a single image but to do multiple images we have to do something like this;
"containerDefinitions": [
    {
        "name": "gql-server",
        "image": "idawud/gql-server",
        "essential": true,
        "memory": 128,
        "portMappings": [
        {
            "hostPort": 80,
            "containerPort": 8080
        }
        ]
    },
    {
    "name": "hell-py",
    "image": "idawud/hello",
    "essential": true,
    "memory": 128,
    "portMappings": [
        {
        "hostPort": 5000,
        "containerPort": 5000
        }
    ]
    }
]
The containers in the containerDefinitions has properties for
name- the container name,image- the image name only if deployed on dockerHub else the url of the image on the container registery must be provided in full.essential- is it essential or not?memory- the memory usage allocation in MegabytesportMappings- we provide two hosts here thecontainerPortthe port the app in the container is running on and thehostPortthe port to map from the host onto the container. There are other properties you can take a look if interested, such as the environment, link, mountPoint etc.
On the AWS Elastic Beanstalk page click on Create Application.

Provide a name for the app and for the Platform choose Docker and Multi-Container for the Platform branch and leave everything as default and click Create Application to deploy the default app.
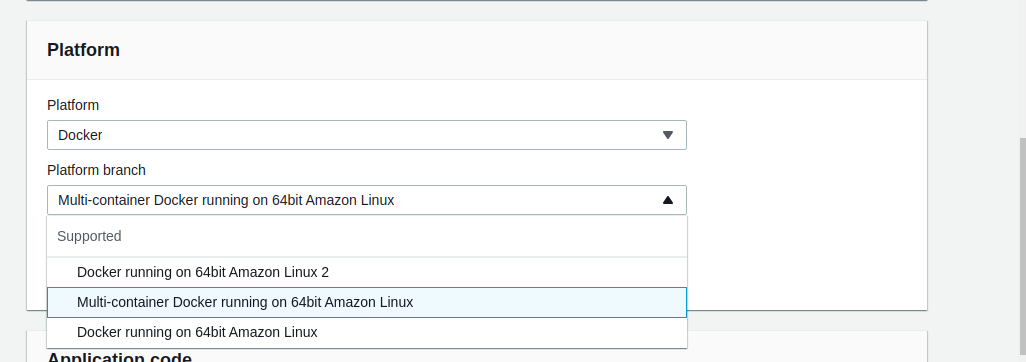 platform type
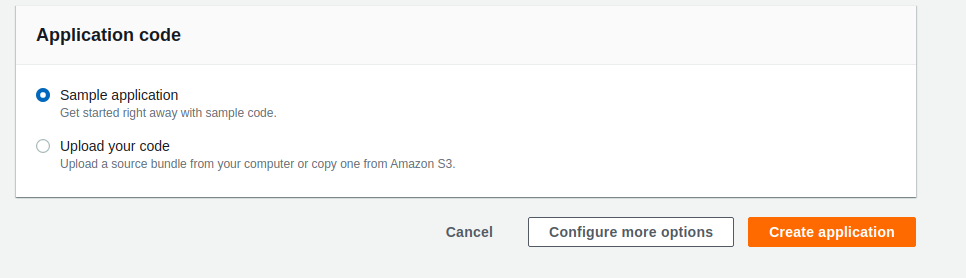 deploy sample app
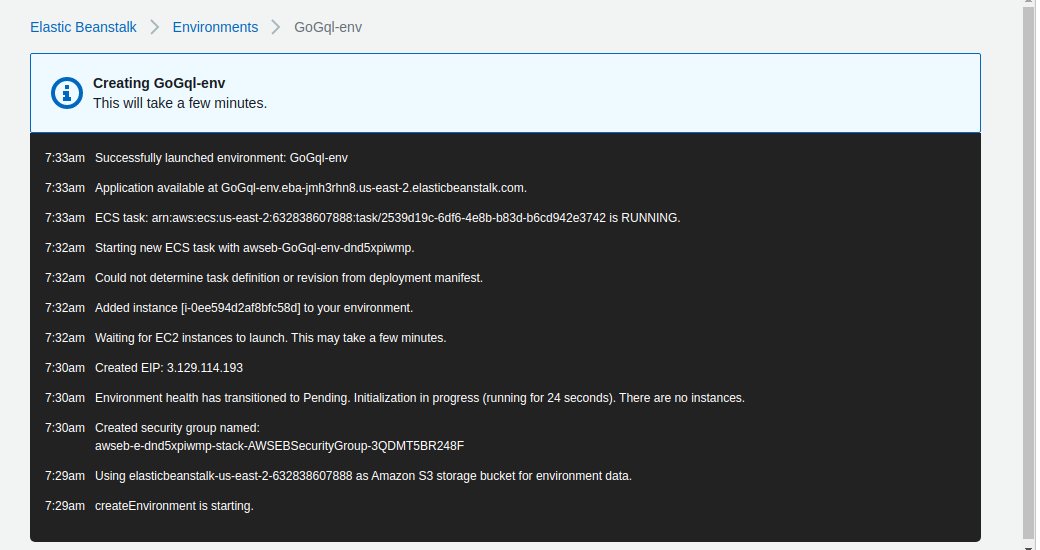
This will create an application environment for us after some few minutes.
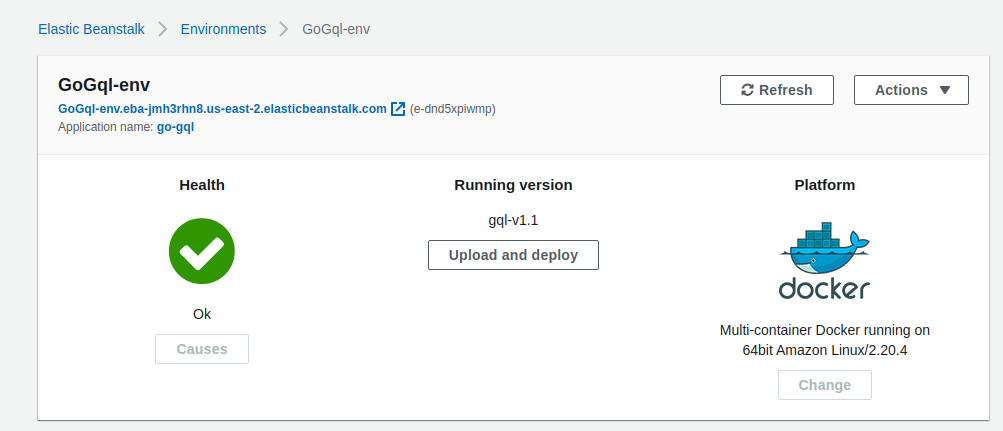
When everything is okay, you should see a page like this and you can access the application from the Load balancer URL generated
So far we only deployed the default app, to deploy the configuration we created we zip the Dockerrun.aws.json file into a .zip file. Click on upload and deploy, choose the .zip file and the application version.This will deploy our new configuration as we’ve seen and you can access the application from the Load balancer URL generated.